
Solar
Crimping an MC4 connector correctly is essential for a safe, efficient solar power system. A poor crimp doesn’t usually fail on day one — it fails months later, as a hot spot on a thermal scan, a nuisance trip, or in the worst cases a DC arc fault. Knowing how to crimp MC4 connectors properly the first time is what separates a connection that lasts 25 years from one that needs a callback in year two.
This guide walks through the tools, the full step-by-step process, the torque and inspection standards from the connector manufacturer itself, and the mistakes that account for most field failures.
Tools and Materials You Need
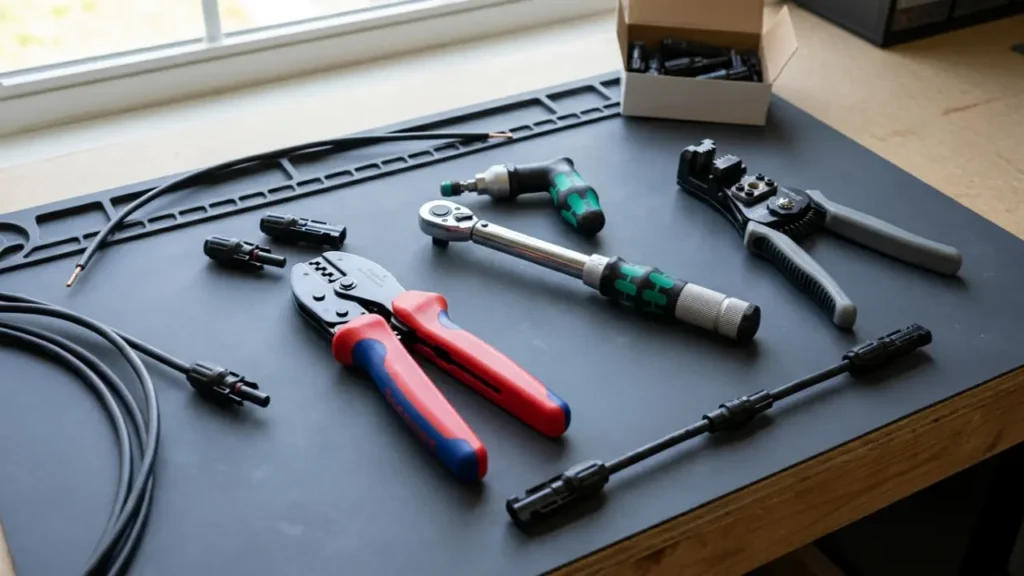
Before you learn how to crimp MC4 connectors step by step, gather everything below. Improvising with the wrong tool is the single most common reason a crimp fails inspection, and it’s the same list whether you’re crimping one adapter cable or an entire commercial array.
- MC4 connectors — male and female, matched brand and voltage rating
- Solar cable — sized to the connector (commonly 2.5–6mm² for standard 30A connectors, up to 10mm² for high-current variants)
- MC4 crimping tool with the correct die for your pin size — a standard electrical crimper will not apply the right pressure profile
- Wire stripper rated for the cable gauge
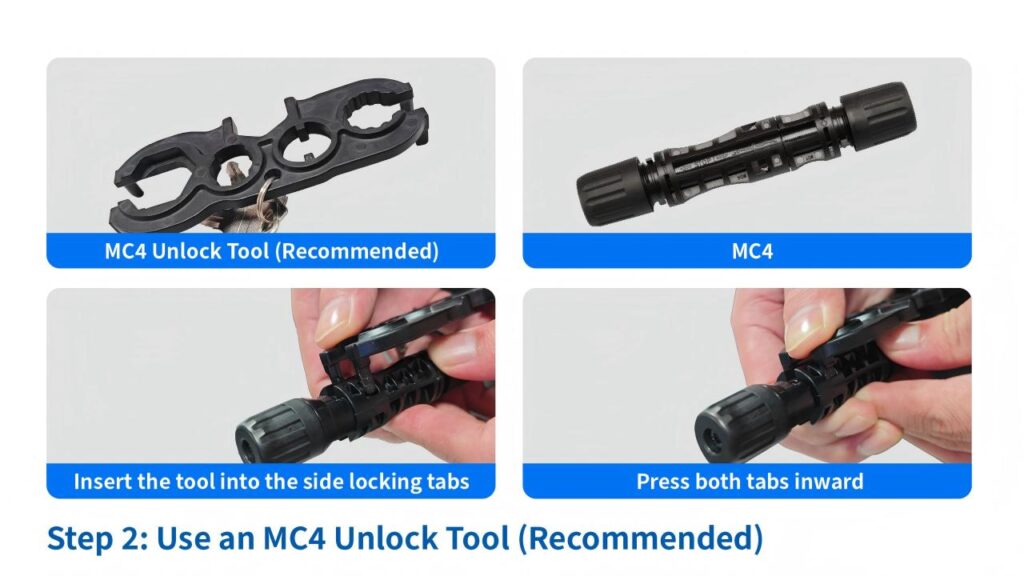
- MC4 assembly/unlocking wrench
- Calibrated torque wrench (see the torque section below — this isn’t optional for a code-compliant install)
- Continuity tester or multimeter
- Insulated gloves
Before You Start: Safety Precautions
Anyone learning how to crimp MC4 connectors safely needs to start here, before touching a single tool. Solar modules generate voltage the moment light hits them — there’s no “off” switch on a panel the way there is on most electrical equipment. Two precautions matter every time you crimp or connect MC4 connectors in the field:
- Cover the panel or work at night/before sunrise so it isn’t generating voltage while you’re handling exposed conductors.
- Never disconnect an MC4 connector under load. Stäubli’s own assembly instructions state this explicitly — disconnecting a live, current-carrying MC4 connector risks an arc that damages the contact and can injure the installer.
Step-by-Step: How to Crimp an MC4 Connector
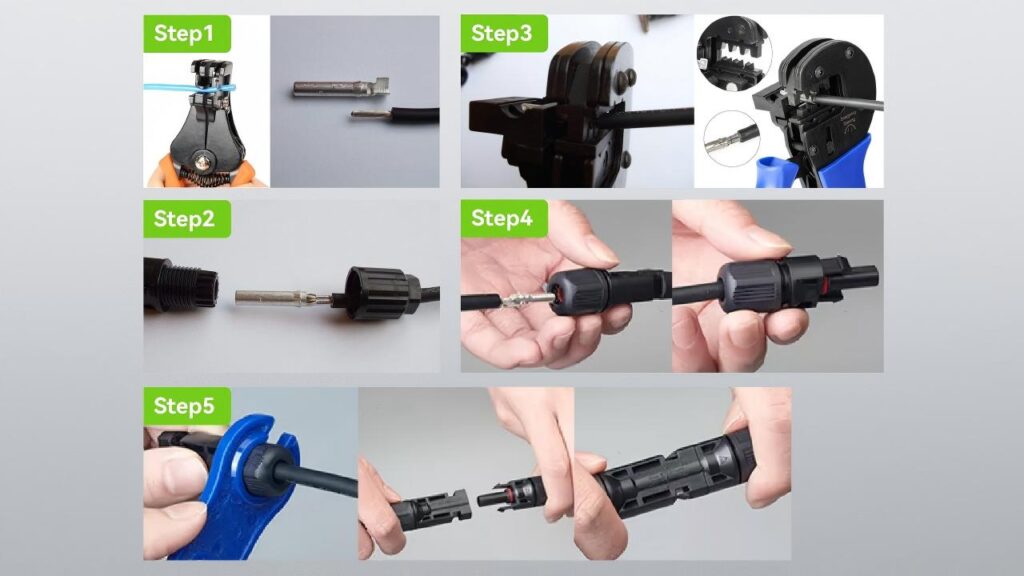
Step 1: Slide the Cap and Seal Onto the Cable First
This is the step almost everyone forgets, and once you’ve crimped the pin it’s too late to fix without cutting the wire back. Unscrew the connector’s end cap, slide it and the rubber seal onto the cable before you crimp anything.
Step 2: Strip the Cable
Strip 6–10mm of insulation from the cable end — the exact length depends on your connector’s pin size and cable gauge, so check the datasheet for your specific connector rather than assuming one number fits every size. Avoid nicking or cutting any copper strands; damaged strands reduce current capacity even if the crimp itself looks fine.
Step 3: Crimp the Contact Pin
Insert the stripped conductor into the metal contact pin so the strands sit fully inside, with none exposed past the wings. Place the pin in your crimping tool’s correct die and apply firm, even pressure until the tool releases. A good crimp should hold under a firm tug test with no visible deformation of the pin.
A detail worth getting right: on a genuine MC4 pair, the female connector housing holds a male-shaped pin contact, and the male connector housing holds a female-shaped socket contact — the reverse of what the “male/female” naming suggests at first glance. Confirm which pin goes with which housing on your specific connector’s datasheet before crimping, since assuming the wrong pairing means redoing the crimp.
Step 4: Insert the Pin Into the Connector Housing
Push the crimped pin into the housing until you hear a distinct click — this confirms the internal locking clip has engaged. Don’t force it; if it doesn’t click, the pin may be misaligned or the wrong size for that housing.
Step 5: Tighten to the Correct Torque
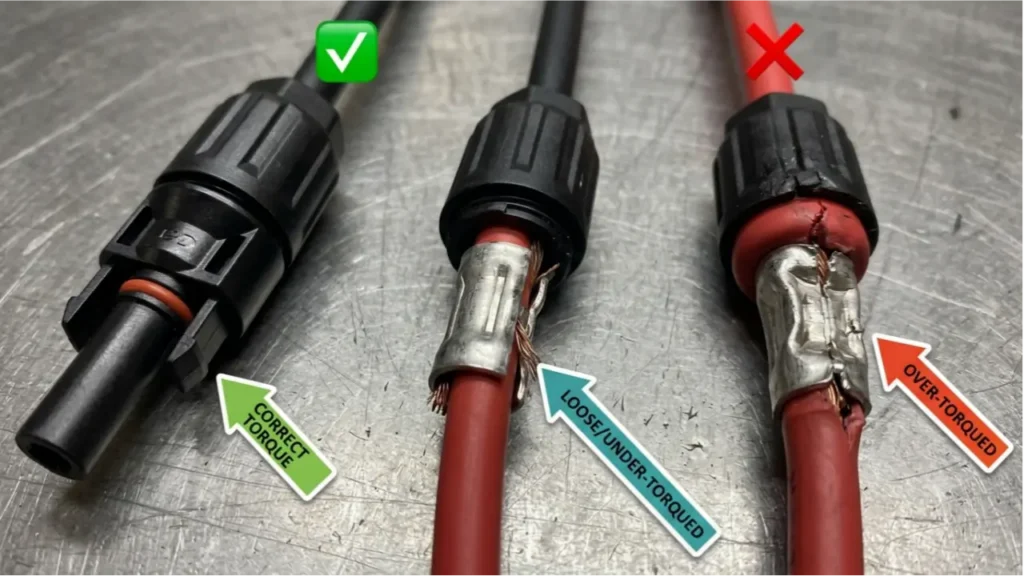
Hand-tighten the end cap first, then finish with a calibrated torque wrench. Stäubli’s own MC4 assembly documentation specifies a tightening torque of roughly 3.4–3.5 N·m, adjusted for the specific cable being used — and in the US, NEC 2017 section 110.14(D) requires a calibrated torque wrench for exactly this kind of termination. Hand-tight alone isn’t sufficient for either code compliance or a reliable IP67 seal; under-torquing leaves a gap water can find, and over-torquing can crack the housing.
How to Test the Crimp Before Final Installation
Knowing how to crimp MC4 connectors is only half the job — testing the result before it’s mounted is what actually catches a bad crimp. Don’t wait until the string is on the roof to find out. Before connecting to the panel or combiner box:
- Pull test — gently but firmly tug the cable; it should not move inside the pin.
- Visual inspection — the rubber seal should sit flush around the cable with no exposed copper, and the pin should show no deformation.
- Continuity test — use a multimeter to confirm a clean, low-resistance path through the connector before it goes into service.
Common Mistakes That Cause Field Failures
Most people who learn how to crimp MC4 connectors get the basic sequence right on the first attempt — it’s these smaller details that cause failures months later, not the core steps.
Using the wrong crimp tool or die size — leads to an under-crimped pin with high contact resistance, which shows up later as heat.
Skipping the cap-and-seal step — forces a redo of the whole crimp, or worse, gets installed without the seal, compromising the IP67 rating from day one.
Incomplete wire insertion into the pin — causes poor electrical contact and, under load, overheating.
Hand-tight only, no torque wrench — the single most common reason a connector fails a post-installation thermal scan; see the torque section above.
Mixing connector brands within a string — even IEC 62852-certified connectors from different manufacturers aren’t guaranteed to mate safely with each other. If you’re working on a string with mixed brands, read our MC4 Connector Compatibility guide before proceeding.
Does the Connector Type Change How You Crimp It?
How to crimp MC4 connectors stays largely the same across every connector in the MC4 connector types family — standard, fused, diode, T-branch, Y-branch — because the difference between these types is inside the housing or in the branch configuration, not in how the pin is crimped to the cable. What does change is the pin size and cable gauge: a high-current or branch-connector output leg crimped for 10mm² cable uses a different die than a standard 4mm² residential crimp. Confirm your crimping tool has the right die for the specific type and cable size you’re installing before starting, not after the first pin is already crimped.
FAQ
[1] Source: Stäubli MC4 Assembly Instructions (MA710)
Related reading: MC4 Connector: The Complete Guide to Solar PV Connections · MC4 Connector Types: The Complete 2026 Comparison Guide · MC4 Connector Compatibility: The Cross-Brand Mating Problem Explained · DC Arc Faults in Solar Systems