Solar
How to Install a Combiner Box for Solar Systems?
How to Install a Combiner Box for solar systems: If you’re diving into solar energy, you might have heard the term “combiner box” tossed around. It plays a key role in your solar system. But how does it actually work? And more importantly, how do you install it properly?
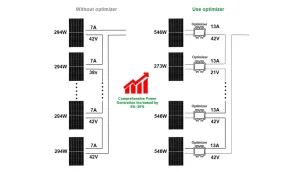
A combiner box is an essential component in solar systems. It allows multiple solar panel strings[^1] to be safely connected to the inverter, helping manage the electricity flow and enhancing system efficiency.
When setting up a solar energy system, the combiner box is one of the most important pieces of equipment. Its main function is to combine the output of several solar panel strings into one cable that leads to the inverter. It helps protect the system from overcurrent and simplifies wiring. However, proper installation is crucial for system safety and optimal performance.
What is a Combiner Box and Why is it Important for Solar Systems?
When building a solar energy system, the combiner box is often a pivotal part that ensures everything runs smoothly. So, why is it so important?
A combiner box consolidates multiple solar panel strings into one connection to the inverter. This makes wiring easier, reduces the number of wires, and prevents system overloads.

What is a Combiner Box?
It also plays an important role in protecting your solar array from short circuits or overcurrent conditions, and some models offer surge protection as well. It makes maintenance more convenient and ensures that the whole solar system works efficiently by managing electrical current properly.
Why Should You Install a Combiner Box?
- Safety: Protects your system from overcurrent and other electrical issues.
- Simplification: Consolidates multiple strings of panels into one manageable wire.
- Maintenance: Makes it easier to troubleshoot and maintain the solar system.
Step-by-Step Guide to Installing a Combiner Box for Solar Systems
Now that you understand its importance, let’s look at the step-by-step process of how to install a combiner box for your solar system.
Before starting, ensure you have all necessary components and tools ready.
Step 1: Choose the Right Location
- Place the combiner box close to the solar array but away from direct sunlight, water, or areas exposed to extreme weather.
- Ensure accessibility for future maintenance and inspections.
Step 2: Turn Off the Power
- Safety first: Disconnect the entire solar system from the grid.
- Verify that there is no power flowing into the system.
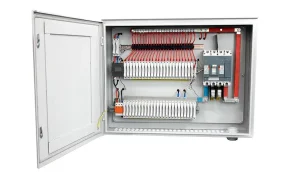
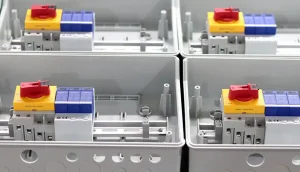
Step 3: Mount the Combiner Box
- Secure the combiner box onto a sturdy surface, such as a wall or a metal pole.
- Ensure it’s mounted at a height that is easily accessible but still protected from external elements.
Step 4: Connect Solar Strings
- Run the positive and negative wires from each solar panel string into the combiner box.
- Follow the manufacturer’s guide on which terminals to connect the positive and negative leads for each string.
Step 5: Wire the Output to the Inverter
- Once all strings are connected, you’ll need to run a cable from the output terminals of the combiner box to the inverter.
- Ensure that the output connection is secure and tight to prevent any electrical issues.
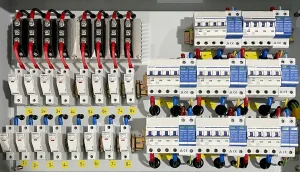
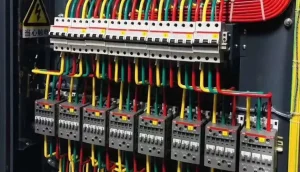
Step 6: Install Fuses or Breakers
- Install the necessary fuses or circuit breakers to prevent overloads or short circuits. These will protect your system from electrical faults.
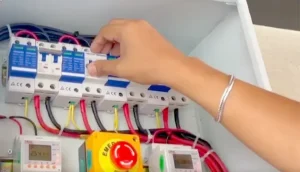
Step 7: Test the System
- Once everything is connected, turn the system back on and check for any issues.
- Monitor the output to ensure everything is running as expected.

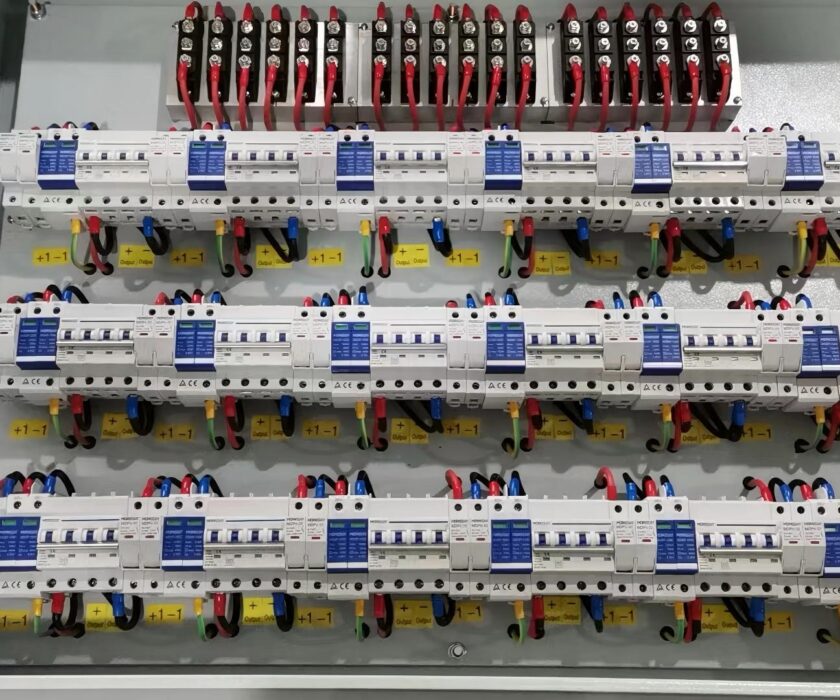
Installing a Combiner Box
Troubleshooting Tips
- Double-check all wire connections if you notice any issues with system performance.
- Ensure the combiner box’s voltage and current ratings match your solar system specifications.
What Tools Do You Need to Install a Combiner Box?
Before diving into installation, it’s critical to gather the right tools for the job. Here’s a list of essential tools you’ll need:
| Tool | Purpose |
|---|---|
| Screwdriver | For mounting the combiner box |
| Wire Strippers | To strip wires for proper connections |
| Wire Cutters | For cutting wires to the correct length |
| Drill | For drilling holes for mounting |
| Voltage Tester | To confirm there is no live electricity |
| Multimeter | For checking the performance of the system |
These tools will help you ensure a secure and safe installation of your combiner box. Always use insulated tools and follow the safety guidelines during installation.
Common Mistakes to Avoid When Installing a Combiner Box
Installing a combiner box might sound straightforward, but there are a few common pitfalls to avoid to ensure your system runs efficiently.
Mistake 1: Incorrect Placement
- Avoid placing the combiner box in areas exposed to excessive sunlight, moisture, or dirt. This can lead to potential damage or system inefficiency over time.
Mistake 2: Skipping the Fuse or Circuit Breaker
- Some people overlook the importance of fuses or circuit breakers. They are essential to protect the system from overcurrent or short circuits, which could cause fires or equipment damage.
Mistake 3: Not Using Proper Wiring
- Ensure that you’re using the correct gauge of wire for your solar system. Using wires that are too thin can lead to overheating or loss of power.
Mistake 4: Poor Connection Quality
- Loose connections or poorly stripped wires can lead to arcing, which is dangerous and reduces system efficiency. Always double-check wire connections for tightness.
Mistake 5: Ignoring the Manufacturer’s Instructions
- Each combiner box may have different installation instructions based on its design and capacity. Skipping the manual could result in an improperly installed system.
Common Mistakes to Avoid
Conclusion
A combiner box is a critical part of any solar system, and proper installation is key to ensuring long-term performance and safety. Avoiding common mistakes and following a systematic approach will help you build a reliable solar setup.
[^1]: Learning about solar panel strings will enhance your understanding of how to effectively manage and connect your solar energy system.